Showing posts with label duel. Show all posts

Tuesday 14 February 2023

Skulferatu #91 - Ferry Hills, North Queensferry, Fife


If you have ever driven across the old Forth Road Bridge to or from Fife, you will have passed right by the Ferry Hills in North Queensferry.  If you have ever taken a train over the Forth Bridge, leaving from or arriving at any of the stations in Fife along from North Queensferry, then you will have passed through the Ferry Hills.  And it was off to the Ferry Hills that I headed today.


The hills are split by the train tracks, and I don’t think there is a path that joins the two parts together.  If there is, well I’ve never found it. So, to start with I walked from the railway station at North Queensferry up to the part of the hills that overlooks the two road bridges.  They both looked very bleak and industrial in the cloudy grey, yet luminously bright winter sky.


A photo of the Queensferry Crossing - a bridge over the Forth from South Queensferry to North Queensferry.  Photo taken by Kevin Nosferatu for the Skulferatu Project.
The Queensferry Crossing


A photo of the Forth Bridge spanning across the Forth in a gray, winter light.  Photo taken by Kevin Nosferatu for the Skulferatu Project.
The Forth Road Bridge


After taking a look at the bridges from a viewing point on the hill, I made my way up to the top and had a wander around the marshy land there, where the Ferry Loch sits.  Other than a few tumbling down stone walls and an old hut, there was nothing much there, just mud, long grass, and gorse bushes. It could have all been quite different though, as it is rumoured that in the 13th Century a group of Jewish elders travelled to Scotland to speak to King Alexander III.  They offered to buy the land at Ferry Hills and the coast below so that they could build a town of refuge there.  However, Alexander had already promised the land to the town of Inverkeithing, so turned down their request.  To think if he had agreed to sell the land, I may have been up there to visit some historic synagogue and have a wander around that.  Maybe then stop off at a deli for a smoked salmon and cream cheese bagel and a piece of cheesecake, or a slice of challah with a dollop of jam on it.  And I wonder why I’m overweight!


A view of one of the towers of the Queensferry Crossing as seen from Ferry Hills in North Queensferry.  Photo taken by Kevin Nosferatu for the Skulferatu Project.
View of the Queensferry Crossing from Ferry Hills


A view of the red, metal humps of the Forth Bridge as seen from Ferry Hills in North Queensferry.  Photo taken by Kevin Nosferatu for the Skulferatu Project.
View of the Forth Bridge from Ferry Hills


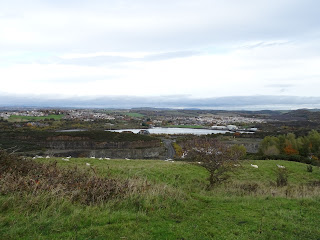
A view over to Inverkeithing from Ferry Hills showing the grassy are on the hills with sheep grazing their and, in the distance, the white dots of the houses in Inverkeithing.  Photo taken by Kevin Nosferatu for the Skulferatu Project.
View over to Inverkeithing from Ferry Hills


A View from Ferry Hills over to Burntisland and the Craigkelly TV Transmitter.  Photo taken by Kevin Nosferatu for the Skulferatu Project.
View from Ferry Hills over to Burntisland and the Craigkelly TV Transmitter


My feet muddy and my trouser legs wet, I made my way back down to the railway station and then up and around to the other side of the hill where, after a quick walk along a path covered in sheep shit, I found a memorial stone commemorating the last fatal duel fought in Fife. 


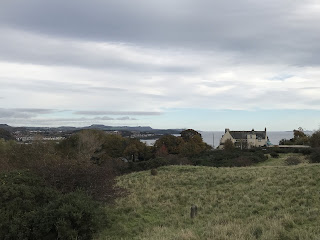
A view over a grassy hill to a white house and on to the coast of Fife.  A memorial stone can been seen sitting in the grass of the hill.  Photo taken by Kevin Nosferatu for the Skulferatu Project.
The piece of ground at Ferry Hills where the duel was fought


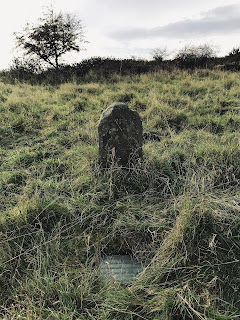
A photo of a memorial stone and plaque standing in the grass of Ferry Hills, North Queensferry.  Photo taken by Kevin Nosferatu for the Skulferatu Project.
The memorial stone and plaque commemorating the duel


A photo of a metal plaque in the grass.  The plaque reads - It is on record that Capt., Wm. Gurley of Petershope, St. Vincent, died at this spot on 30th October 1824, having been fatally wounded in a pistol duel with a Mr. Westall - the last to be fought in Fife.  Photo taken by Kevin Nosferatu for the Skulferatu Project.
The plaque commemorating the duel


The story of this deadly encounter begins, and ends, in 1824.  That year William Gurley, a Captain with the Aberdeenshire Militia, had moved to Edinburgh with his wife and children.  Being a typical gentleman of his time, Gurley liked to bet on the horses, and in September of that year had gone to the races at Doncaster.  There he met up with an acquaintance, John Waistell (or Westall).  At one of the races Waistell had lost a bet of seventy Guineas to Gurley, and not having the money on him to pay, promised that he would do so on their return to Edinburgh.  However, back in Edinburgh he did his best to avoid Gurley, leading Gurley to believe that he was trying to get out of paying him.  Gurley, who was described by his friends as being a bit of a hot head at the best of times and having quite a violent temper, did not take kindly to what he saw as an affront to him by Waistell.  One day while out dining with his friend James Barr, Gurley decided they should go to the Black Bull Inn, where Waistell was lodging, so that he could confront him about his dishonourable behaviour and ask him to pay the money he owed.  So, they toddled off there.  As you can probably imagine, it did not go well.  Words were exchanged with Gurley calling Waistell a scoundrel and Waistell calling Gurley a liar, an insult which made Gurley so mad he picked up a poker from the hearth and struck Waistell across the neck and shoulders with it.  Waistell collapsed to the ground and Barr rushed to his aid, fearing that Gurley might have killed him.  Waistell soon recovered though and the insults between the two men flew once more, before Barr persuaded Gurley to leave.  After this there was much toing and froing between intermediaries from Gurley trying to persuade Waistell to pay his debt.  Waistell promised he would, but then either found excuses not to, or on a couple of occasions wrote out promissory notes that could not be cashed.  Eventually Gurley exploded with rage and a duel was agreed between the two men. 


On Saturday 30th October 1824, Gurley, and his seconds went to Salisbury Crags in Edinburgh to meet Waistell to duel with pistols.  He didn’t turn up.  Gurley was not a happy man.  But then a note arrived from Waistell giving his apologies and stating that one of his seconds had been unable to make it and this had caused his delay.  It was then agreed that given the time of day, the two men couldn’t duel in Edinburgh as there would be too many people around, so it was decided they would make their way to North Queensferry and duel there.


That afternoon the two men and their seconds took the ferry over to North Queensferry and found a secluded bit of ground on the Ferry Hills.  There the seconds handed them their pistols and it was agreed that ‘once, twice, thrice’ would be called and on ‘thrice’ they were to fire.


The signal was given and Waistell fired.  He shot Gurley straight through the heart, and Gurley dropped to the ground dead before he could even return fire.  On seeing that Gurley was dead, Waistell was so distraught that he put a pistol to his own head and threatened to kill himself.  His friends managed to disarm him and quickly rushed him away from the scene.


Gurley’s body was taken to a nearby inn, and he was buried a few days later at St Peter’s Churchyard in Inverkeithing.  As for Waistell, a warrant was issued for his arrest, but he disappeared and either assumed a new identity or left the country, as he was never seen or heard from again.  So, there ends the sad tale of the duel fought on Ferry Hills.  If there is any moral to this story then I suppose it is that betting is not good for your health, and neither are hot tempers and guns.


I left the Skulferatu that had accompanied me on my walk by a rabbit burrow near to the memorial stone.


A photo of a small, ceramic skull (Skulferatu 91) being held up with a view of the memorial stone in the background.  Photo taken by Kevin Nosferatu for the Skulferatu Project.
Skulferatu #91


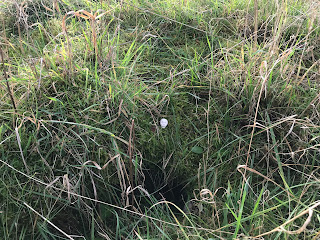
A photo of a small, ceramic skull (Skulferatu 91) sitting in the grass beside a rabbit burrow.  Photo taken by Kevin Nosferatu for the Skulferatu Project.
Skulferatu #91 sitting in the grass by a rabbit burrow


A photo of a small, ceramic skull (Skulferatu 91) sitting in the grass beside a rabbit burrow.  Photo taken by Kevin Nosferatu for the Skulferatu Project.
Skulferatu #91 sitting in the grass by a rabbit burrow


TomTom Map showing location of Skulferatu #91
Map showing location of Skulferatu #91


The coordinates for the location of the Skulferatu are –


Latitude 56.016023

Longitude -3.395713


what3words: array.flows.national


I used the following sources for information on Ferry Hills and the duel fought by Gurley and Westall -


The Fringes of Fife

By John Geddie

1894


Inverkeithing, North Queensferry, Limekilns, Charlestown, The Ferry Hills

Their Antiquities and Recreative Resources

Edited by Andrew Cunningham

1899


Scotland’s Penultimate Duel

J. M. Leggett

1998


The Scots Magazine - Wednesday 1 December 1824


Canmore – Ferry Hills

Canmore - Ferry Hills


Tuesday 24 May 2022

Skulferatu #71 - St Leonard's Crag, Holyrood Park, Edinburgh

There are many stories around the hills and paths of Holyrood Park and of the hills and paths leading into the park.  Today, while out on a walk around Edinburgh I cut through the St Leonard’s area of town, onto St Leonard’s Hill and over to St Leonard’s Crag which runs alongside Holyrood Park.  On the flat area of the crag there stands the old James Clark School, which has now been converted into flats. Long before the building was there, this was the site of a rather notorious event in the history of old Edinburgh.


A photo showing the tower and part of the building of the old James Clark School building that sits on the site of St Leonard's Crag in Edinburgh.  Photo by Kevin Nosferatu for the Skulferatu Project.
View down St Leonard’s Bank to the old James Clark School building


An old style photo showing the St Leonard’s Crag street sign. Photo by Kevin Nosferatu for the Skulferatu Project.
St Leonard’s Crag street sign


A photo showing part of the building of the old James Clark School with a dirt path running along the side of it at St Leonard's Crag in Edinburgh.  Photo by Kevin Nosferatu for the Skulferatu Project.
View of James Clark School from St Leonard’s Crag


An old style photograph showing a view through a gap in the trees on St Leonard’s Crag out over to Arthur’s seat in Holyrood Park in Edinburgh. Photo by Kevin Nosferatu for the Skulferatu Project.
View through trees from St Leonard’s Crag to Arthur’s Seat in Holyrood Park


The story goes that on a warm spring day many years ago, Sunday 2 April 1600 to be precise, St Leonard’s Crag was the site of a duel with tragic consequences for both parties.  The night before, Robert Auchmowtie, a barber surgeon from Edinburgh, had been drinking with friends in one of the local taverns.  Also out drinking that night with a group of friends, was James Wauchope, the son of a wealthy local merchant.  At some point during the night Auchmowtie and Wauchope got into an argument with each other.  The reason for the argument is not recorded, but I would guess that too much alcohol and surging testosterone played quite a big part in it.   The result of the argument and the harsh words they exchanged with each other was that Auchmowtie and Wauchope decided to settle things the next morning with a duel at St Leonard’s Crag.


At five the next morning Auchmowtie and Wauchope both met on St Leonard’s Crag, each arriving with two companions to ensure fair play.  The duel then commenced with swords being the weapon of choice.  The fight appears to have quickly gone Auchmowtie’s way and within minutes he had struck Wauchope several times to his face and head.  Bleeding heavily and mortally wounded Wauchope fell to the ground.  The duel over and honour restored, Auchmowtie and his companions left while Wauchope’s companions comforted him during his final moments.  They then carried his body home.


The matter did not end after the duel.  Wauchope’s father on hearing of his son’s death was understandably upset but was also enraged, and he informed the authorities that his son had been murdered by Auchmowtie and two accomplices.


After some hesitation on the part of the authorities, a warrant was issued for Auchmowtie’s arrest, and on the 23 April 1600 the City Guard arrested him for murder.  At first the court was favourable towards Auchmowtie and his version of events.  They accepted that Wauchope had been killed fairly in a duel that he had consented to take part in.  There were various postponements of proceedings and it looked very much like the matter would be dismissed with no trial taking place.  However, Wauchope’s relatives had friends in high places and after petitioning King James they submitted several letters to the court from him.  Firstly the king asked the court to look at the case again, but when they didn’t move on this he wrote and ordered that Auchmowtie be put on trial for murder and taking part in a duel without having been granted a licence to do so (odd as it may sound now, the King, or Queen, could grant a licence for a duel to take place, as it was seen as sometimes being a way to end a feud and avoid a lot of unnecessary bloodshed).  Auchmowtie was then tried for murder, and probably due to the king getting involved, was found guilty.  He was sentenced to death and sent to the Tolbooth Prison to await execution.


While imprisoned Auchmowtie, feeling hard done by and not particularly relishing the prospect of being put to death, came up with a plan to escape.  He hung a cloak outside the window of his cell and a cloak on the inside.  He told the prison guards that he was ill and could not bear daylight.  The guards accepted this without question, though unbeknownst to them Auchmowtie had acquired some aqua fortis (nitric acid) and was applying this to the iron bars of his cell window.  Within a few days the acid had done its work and eaten through the bars.


Auchmowtie then put his plan to escape into action.  He summoned his apprentice and showed him the dissolved and broken bars at the window and asked if he would go out and signal to him when the guard stationed outside the prison had left.  The boy then willingly agreed to help him and went to wait outside and keep watch, while Auchmowtie pulled the cloaks back slightly from the window and peered down at him…waiting…waiting…


The guard eventually wandered off and on seeing this the boy pulled a white handkerchief from his pocket and waved it up to Auchmowtie, as the agreed signal.  Auchmowtie pulled the cloaks back and lowered out a rope he had crudely constructed from his bedsheets.  He then clambered through the window and began to scramble down to freedom.  However, the guard had noticed the boy earlier and having become suspicious had actually hidden himself so he could observe what he was up to.  On seeing Auchmowtie come out through the prison window the guard ran back and grabbed him as he lowered himself to the ground.  He then struck him on the head with his cudgel to subdue him and summoned other guards from inside the prison.  Auchmowtie was bound and placed in another cell where a watch was kept over him.


Auchmowtie languished there in despair until the day of execution arrived, when he was taken from his cell and marched through the streets by the Town Guard to the Market Cross (the current Mercat Cross, near to St Giles’ Cathedral, stands close to the location of the original Market Cross).  There a platform had been constructed on which stood the Maiden (an early form of the guillotine).  In front of a huge crowd of excited spectators, Auchmowtie was led up onto the platform where he prayed briefly with a local minister.  He was made to kneel in front of the Maiden and place his head on the block.  An iron bar was then pulled down over the back of his neck to stop him from pulling away or lifting his head.  Seconds later the executioner was given a signal, the blade of the Maiden was released and RUMBLE, THUD, SPLAT, Auchmowtie was beheaded, and the crowd let out a cheer.


Illustration of the Maiden from Cassells Old and New Edinburgh, Volume 1.  This shows a tall wooden structure that looks a lot like a guillotine and was used in Edinburgh to behead those convicted of various crimes.
Illustration of the Maiden from Cassells Old and New Edinburgh, Volume 1


And so, my dear friends, that is the end of Auchmowtie and his story. No last minute escapes and no happy Hollywood endings here I’m afraid. 


Today, on my walk I left a Skulferatu in the bark of an old tree at St Leonard’s Crag, where it can watch over any more drunken duellers who stumble there to sort their differences out with a bit of violence.


An old style photo of an old, gnarly tree at St Leonard’s Crag.  Its branches are bare of leaves. Photo by Kevin Nosferatu for the Skulferatu Project.
Old, gnarly tree at St Leonard’s Crag


A photo of a hand holding up a small, ceramic skull (Skulferatu 71).  In the background is a gnarly old tree on St Leonard's Crag. Photo by Kevin Nosferatu for the Skulferatu Project.
Skulferatu #71


A photo of a small, ceramic skull (Skulferatu 71) sitting in the bark of a tree. Photo by Kevin Nosferatu for the Skulferatu Project.
Skulferatu #71 in bark of old tree at St Leonard’s Crag


A photo of a small, ceramic skull (Skulferatu 71) sitting in the bark of a tree. Photo by Kevin Nosferatu for the Skulferatu Project.
Skulferatu #71 in bark of old tree at St Leonard’s Crag


TomTom Map showing location of Skulferatu #71
Map showing location of Skulferatu #71


The coordinates for the location of the Skulferatu are:


Latitude 55.943685

Longitude -3.1772880


I used the following sources for the tale of Robert Auchmowtie –


Cassels Old and New Edinburgh – Volume 1

(pages 383-384)

By James Grant


Criminal Trials in Scotland – Volume Second

(pages 112 to 124)

By Robert Pitcairn

1833

Digital version available from National Library of Scotland


History of Scottish Medicine to 1860 – Volume 1

(pages 190 to 191)

By John D Comrie

1927

Available at https://electricscotland.com


The National Museums of Scotland Website

The Maiden (nms.ac.uk)


Article and photographs are copyright of © Kevin Nosferatu, unless otherwise specified.

Monday 19 July 2021

Skulferatu #37 - Cramond Island, Edinburgh


I only discovered the joys of the walk out to and around Cramond Island during lockdown.  It was one of these places that I had always meant to go to though never quite got round to doing it.  I had cycled and walked along the front at Cramond and passed the causeway out to the island many times but had just never ventured out there.  One of the few joys of lockdown though was discovering new places to walk and making a point of actually going to places in my locale.  So, for maybe the third time in a year I went on a stroll out there today.  Before setting out I checked the tide times, crucial to avoid getting trapped on the island and wasting the time of the local Lifeboat crew.  I then took a stroll along the causeway to the island.


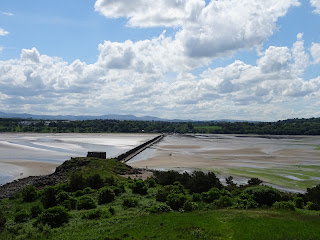
The causeway out to Cramond Island is a rough concrete path, raised a few feet up from the sand.  It is covered in cockles, and I found myself dancing around the path trying not to squash them.  Running along the side of the causeway is a very distinctive looking barrier of concrete pylons, this was built in WWII as an anti-boat barrier.


Causeway out to Cramond Island, Edinburgh with large, concrete pylons stretching out along it.  Photo by Kevin Nosferatu for the Skulferatu Project.
Causeway out to Cramond Island


Concrete Pylons built in WWII as an anti-boat barrier with a cloudy sky above them.  Photo by Kevin Nosferatu for the Skulferatu Project.
Concrete Pylons built in WWII as an anti-boat barrier


Gun emplacement at the South Side of Cramond Island, by the Causeway and concrete pylons. Photo by Kevin Nosferatu for the Skulferatu Project.
Gun emplacement at the South Side of Cramond Island, by the Causeway


Gun emplacement at the South Side of Cramond Island, Edinburgh.  Photo by Kevin Nosferatu for the Skulferatu Project
Gun emplacement at the South Side of Cramond Island


View over to A view over the sea from Cramond Island to Granton gasworks with Arthur’s Seat and Edinburgh in the background.  Photo by Kevin Nosferatu for the Skulferatu Project
View over to Granton and Arthur’s Seat from Cramond Island


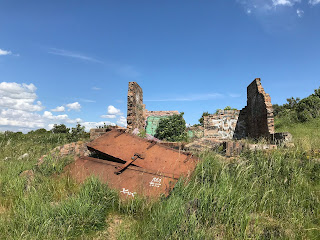
On the island there is a path that takes you all the way around, past a host of abandoned concrete and brick buildings.  These are the remains of the fortifications that were built here during WWII and are the buildings that housed various gun emplacements and anti-shipping searchlights.  On one of the beaches are two huge concrete blocks, these were anchor points for an anti-submarine net that stretched over to Inchcolm Island and then over to the Fife coast.  


Abandoned WWII building on Cramond Island.  The building is overgrown and disappearing into the undergrowth. Photo by Kevin Nosferatu for the Skulferatu Project
Abandoned WWII building on the island


Inside view of one of the abandoned WWII buildings on Cramond Island.  It is a concrete shell covered in graffiti.  Photo by Kevin Nosferatu for the Skulferatu Project
Inside view of one of the abandoned WWII buildings


Abandoned WWII buildings on Cramond Island, Edinburgh.  Photo by Kevin Nosferatu for the Skulferatu Project
Abandoned WWII buildings on the island


Abandoned WWII buildings on Cramond Island, Edinburgh.  Photo by Kevin Nosferatu for the Skulferatu Project
Abandoned WWII buildings on the island


View over the Forth to Fife from the empty concrete window of one of the abandoned WWII buildings on Cramond Island, Edinburgh.  Photo by Kevin Nosferatu for the Skulferatu Project
View over the Forth to Fife from one of the buildings 


Bunker at north side of Cramond Island, Edinburgh.  The outside of the wall of the bunker is colourful with graffiti. Photo by Kevin Nosferatu for the Skulferatu Project
Bunker at north side of the island


Bunkers at north side of Cramond Island, Edinburgh.  Photo by Kevin Nosferatu for the Skulferatu Project
Bunkers at north side of the island


Abandoned WWII building on north side of Cramond Island, Edinburgh.  Photo by Kevin Nosferatu for the Skulferatu Project.
Abandoned WWII building on north side of island


A set of large heavy doors covered in rust lie next to a small, demolished building on Cramond Island, Edinburgh.  Photo by Kevin Nosferatu for the Skulferatu Project.
Ruined building and rusting doors


Two large concrete blocks on the beach that were anchor points for an anti-submarine net.  Photo by Kevin Nosferatu for the Skulferatu Project
Concrete blocks on beach that were anchor points for an anti-submarine net


Detail of one of the concrete blocks on the beach at Cramond Island that were anchor points for an anti-submarine net.  Photo by Kevin Nosferatu for the Skulferatu Project
Detail of one of the concrete blocks


The WWII buildings left on Cramond Island pale in comparison to those that can be seen on the island of Inchmickery which sits between Cramond Island and the Fife Coast.  The island there is so covered in the concrete remains of WWI and WWII fortifications that it looks like a large battleship sitting out in the Forth.  At one point in time Inchmickery was famed for its oyster beds and the ‘rich profusion of sea-weed, mosses and lichens, on its beach and surface.’  Now these have pretty much all disappeared.


A view from Cramond Island of Inchmickery Island which is so heavily fortified that it looks like a battleship sitting out at sea.  Photo by Kevin Nosferatu for the Skulferatu Project.
Inchmickery Island


Cramond Island has a history stretching back into the mists of time.  It is believed that the Romans would have used the island during their time in Cramond, however no archaeological evidence of this has been found. 


View out over the causeway and southern gun emplacement from top of hill on Cramond Island, Edinburgh.  Photo by Kevin Nosferatu for the Skulferatu Project
View out over the causeway from top of hill on Cramond Island


In 1596 the island was the site of a duel which ended a long running feud.  The feud came about after Mary Queen of Scots had fled to England leaving behind various factions in Scotland who were hostile to each other.  Some supported the Queen, while others supported James Stewart, the Earl of Moray, who was acting as the Regent.  One of those who supported the Queen was Stephen Bruntfield, the Laird of Craighouse, while one of those who supported the Regent was Robert Moubray, Laird of Barnbougle and an arch enemy of Bruntfield.  In 1572, Moubray, who was hoping to ingratiate himself with the Regent, lay siege to Bruntfield’s castle at Craighouse.  Bruntfield held out for a while but surrendered to Moubray when he was promised by the Regent that his life would be spared, and he would keep his property and estates.  Moubray however saw Bruntfield’s surrender as a perfect opportunity to get rid of someone he despised, and while escorting him to Edinburgh, to meet with the Regent, he ran him through with his sword and murdered him.  Bruntfield’s widow was so overcome with grief at the death of her husband that she retired to her rooms within Craighouse Castle, draped them in black and never left them again.  According to those who knew her, she then spoke of nothing but having revenge on Moubray for the murder of her husband.   This obsession with revenge she passed on to each of her three sons who each took a turn in duelling with Moubray.  The eldest, Stephen, was the first to try his hand and Moubray slew him at a duel just outside Holyrood Palace.  A couple of years later, her middle son, Roger, fought a duel with Moubray and seemed to be gaining the upper hand, but he slipped and fell and Moubray struck off his head as he lay on the ground.  A few years after this, the youngest son, Henry, also challenged Moubray to a duel.  There was some debate about whether a duel could be fought given that Moubray had already fought twice over the same issue, but as Moubray was keen to fight again it was agreed that the duel could go ahead.  On Cramond Island, a spot was chosen close to the northern beach with a raised area behind it where spectators could gather.  The duel then took place, and it was bloody and long with both duellists seriously wounding each other.  Eventually as both were stumbling with fatigue Henry found a last reserve of strength, lunged with his dagger drawn at Moubray and stabbed him through the heart.  Moubray gave a sigh of surprise at having lost and fell down dead.  Henry’s mother, on hearing the news that Moubray had been killed and she had been revenged, promptly dropped down dead as well.  Henry then later married Moubray’s niece and inherited much of Moubray’s wealth and property.  


Cramond Island has also been the scene of many tragedies involving ships coming to grief on the rocks around it, or people being drowned when caught by the tide while making the crossing to and from the island.  In 1954 a Gunner who was stationed on the island, drowned while making his way back after a day’s leave.  The incoming tide caught him as he tried to wade out to the island and his body was found the next day lying in a rock pool.


For many years, the island was used for farming and grazing sheep.  Though now uninhabited, up until the 1930s people lived on the island, and an article in the West Lothian Courier of 1923 describes it as being the only inhabited island in the Forth.  It goes on to describe there being ‘several small red-tiled cottages upon the island.  In the most sheltered corner they lie, and were built, it is said, out of the remains of a large house which used to stand there.’ 


It was rumoured that there was an underground passage on the island that led, get this for a nice and vague description, ‘somewhere’.  This secret passage was described as having been lost for centuries and it is probably no surprise to hear that no trace of this has ever been found.


The island was also one of the favourite haunts of the author Robert Louis Stevenson and in his youth he and one of his friends would regularly canoe from Granton out to Cramond Island.


Cramond Island has also been the site of the DIY ‘Island of Punk’ festival.  The festival lasts for a day with the audience helping the bands to carry their equipment across the causeway to the island.  Various punk bands have played there including local Edinburgh favourites such as Oi Polloi and Bloco Vomit.


On my trek today around the island I left the Skulferatu that accompanied me in the ruined wall of the Duck House, a building that was once a shelter for shooting parties and later rented out as holiday accommodation.  Now it is little more than a wall facing out to the Forth Bridges.


Remains of the Duck House, Cramond Island.  A wall next to some rocks is all that remains of this hunting shelter come holiday accommodation.  Photo by Kevin Nosferatu for the Skulferatu Project.
Remains of the Duck House


Skulferatu #37 on Cramond Island  being held up by the Duck House.  Photo by Kevin Nosferatu for the Skulferatu Project
Skulferatu #37


Skulferatu #37 in crack in wall at the Duck House, Cramond Island, Edinburgh.  Photo by Kevin Nosferatu for the Skulferatu Project
Skulferatu #37 in crack in wall at the Duck House


Map showing location of Skulferatu #37 on Cramond Island, Edinburgh
Map showing location of Skulferatu #37


The coordinates for the location of the Skulferatu are –


Latitude 55.994815

Longitude -3.291634


I used the following sources for information on Cramond Island -


Cassels Old and New Edinburgh, Vol 3

By James Grant

1883


The Book of Scottish Story

Various Authors

1896


The Scotsman 4th June 1925

Favourite Haunts of R.L.S.


West Lothian Courier – Friday, August 3, 1923

Cramond Island – An Appreciation


Belfast Telegraph – Monday, August 16, 1954


Wikipedia

Wikipedia - Cramond Island


Article and photographs are copyright of © Kevin Nosferatu, unless otherwise specified.